RESIN JEWELLERY OVERVIEW
Resin Suppliers & Materials
UV Resin: Spotlight & Officeworks
Bezels & Findings: Spotlight & Officeworks
Jewellery Supplies: www.Koodak.com.au
Green Resin Tape: Available online (Spotlight stocks clear tape)
Dried Flowers: Amazon often has the best price and variety
Nail Embellishments: Are great for earrings, search for online .
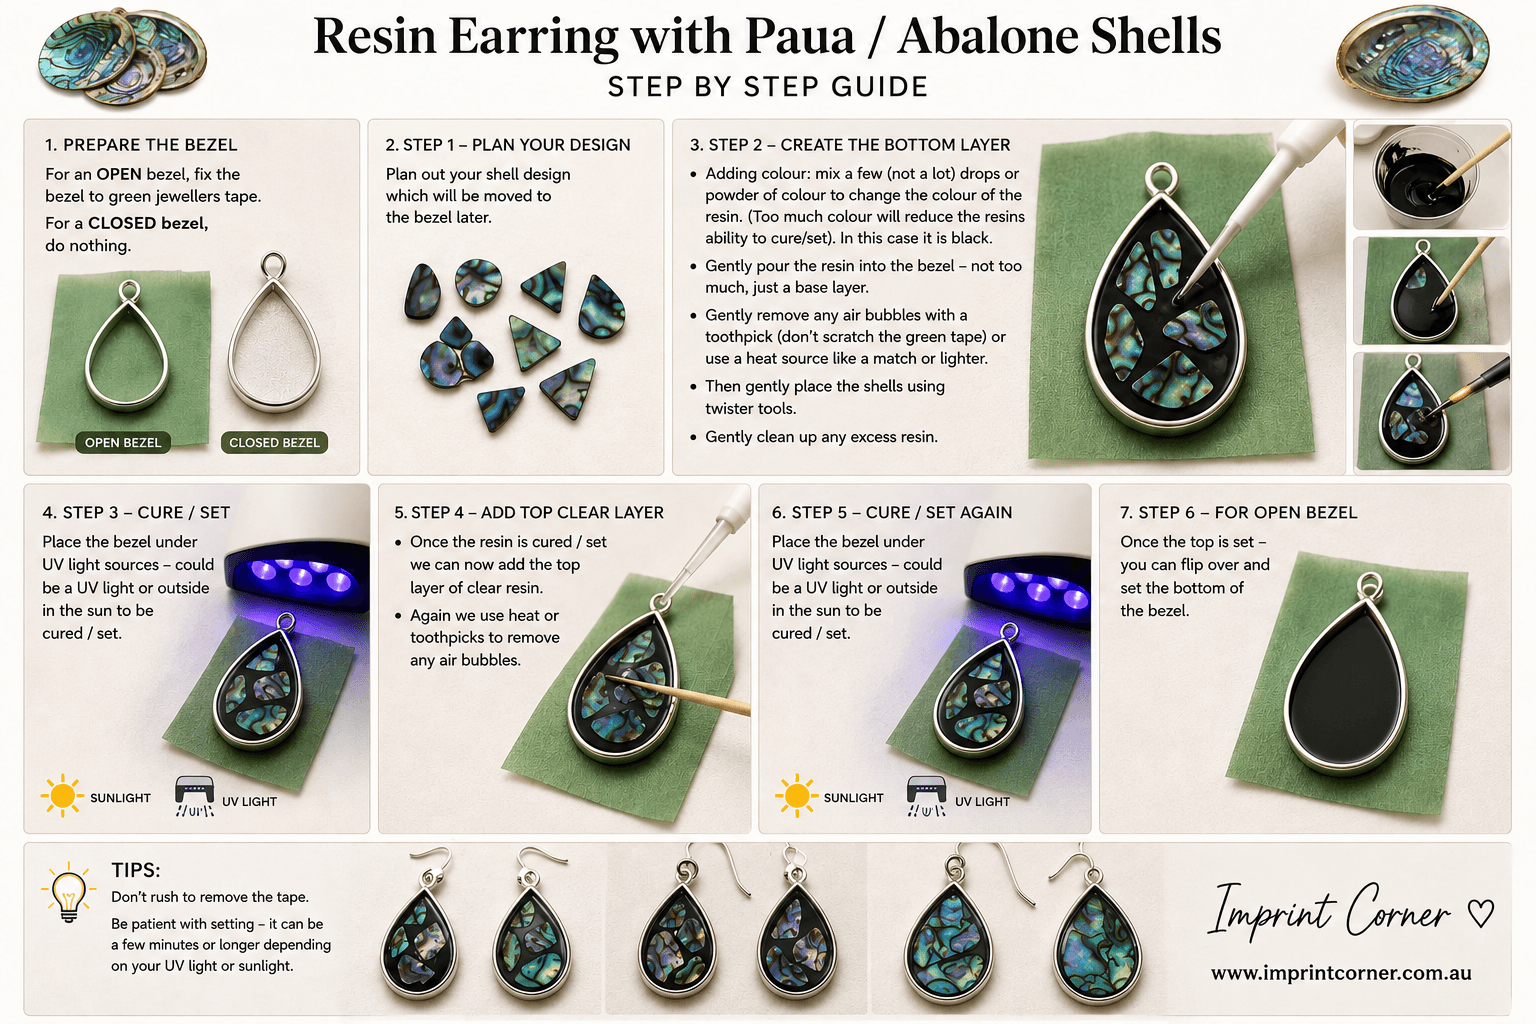
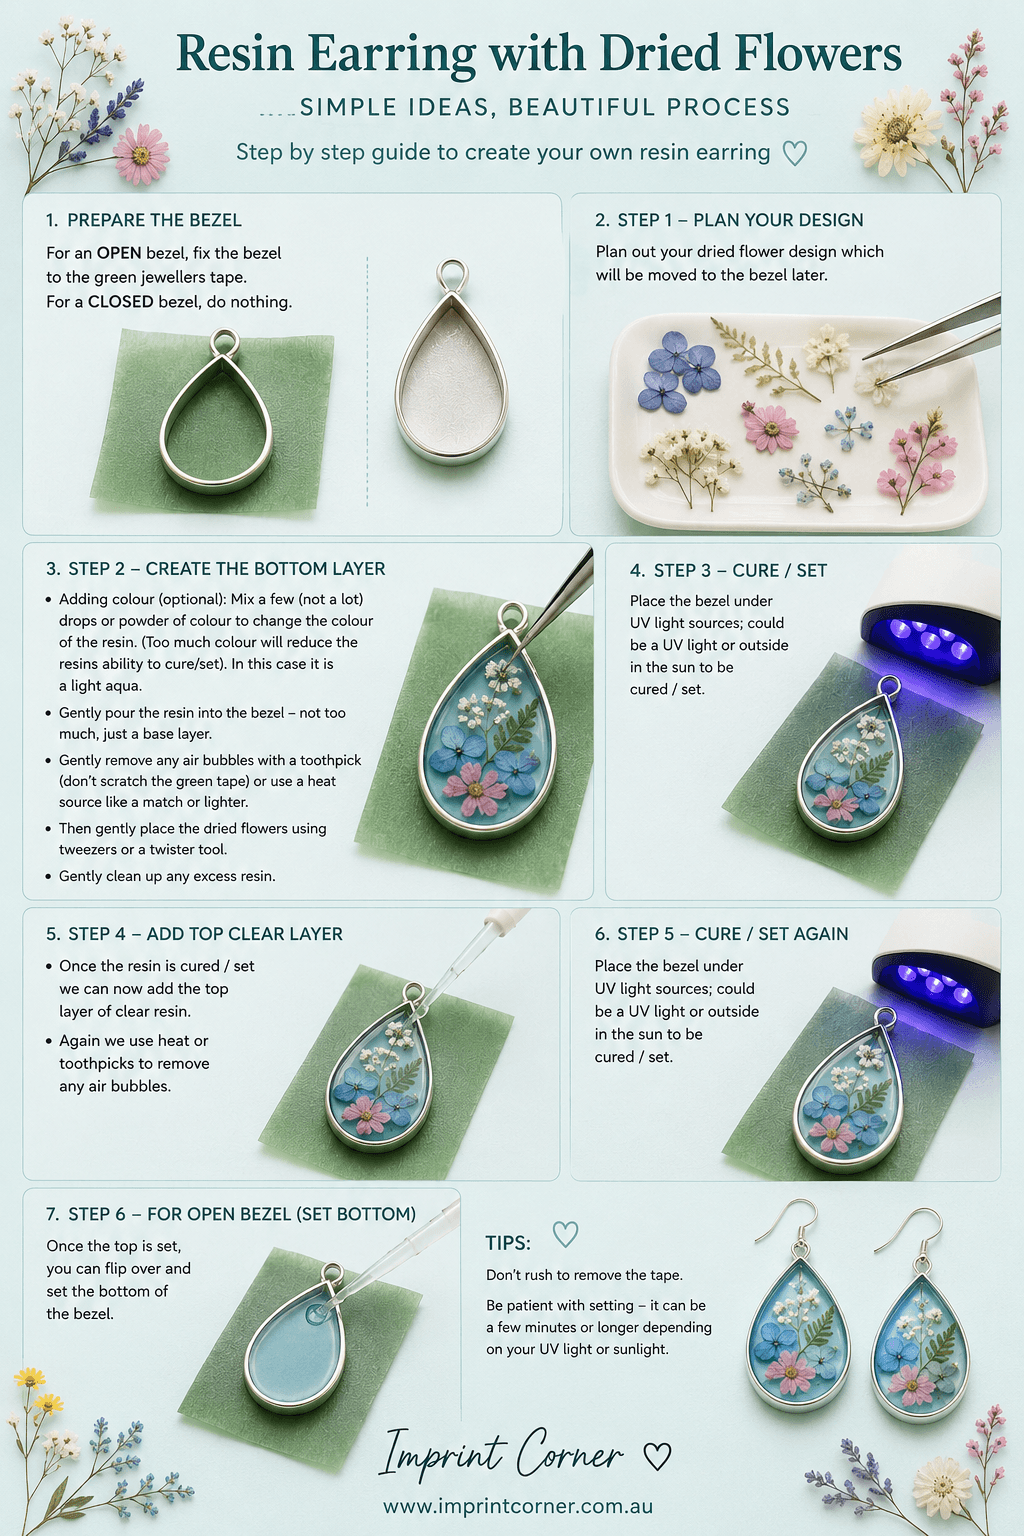
Working with Open Bezels
When using an open bezel, cure the back side after you have cured the front, cure first before removing the green tape. This helps ensure the resin is fully set and gives a smooth, clean finish.
Using Paper, Images or Stickers
Recommend closed-back bezel provides an straighter firm glueing surface. When using paper, images, or stickers, glue them into a closed-back bezel first and allow the glue to dry completely before adding resin. Closed-back bezels generally provide a smoother finish for image-based pieces.
Air Bubbles
Keep an eye out for bubbles while working.
You can remove them by using a toothpick, or lightly passing a match or lighter over the resin surface.
Avoid overheating the resin or tape.
Green Resin Tape
Green resin tape (also called seamless resin tape or UV resin tape) is used to seal the back of open bezels while the resin cures. The tape prevents resin from leaking, and creates a smooth, clean back surface once removed.
Tips for Using Resin Tape
Keep the tape clean and free from fingerprints.
Avoid scratching the tape with tools, as marks may transfer to the resin surface.
Press the bezel firmly onto the tape before adding resin to create a strong seal.
At home, a heavy flat object such as a book or timber block works well for pressing the bezel onto the tape.
Try not to move the bezel once resin has been added, as this can break the seal and cause leaks.
Adding thin layers of resin helps reduce leaking and improves curing.
Curing the Resin
To cure UV resin place the piece in sunlight, or use a UV lamp. FLAT SURFACE. Sunlight works very well and is an easy, cost-effective option.
Layering Resin
A simple layering process is:
Add a thin base layer of resin.
Place your feature items (flowers, shells, glitter etc.).
Cure the layer to secure the items in place.
Add another layer of resin and cure again.
Layering helps prevent decorative items from floating or shifting.
Adding Colour to Resin
When adding colour to resin, use small amounts at a time. Too much pigment, ink, or colourant can prevent the resin from curing properly or leave it soft and tacky. On the workshop we use pigment and mica colours. Most of the pigment are opaque.
Start with a tiny amount, mix well, and gradually build the colour until you achieve the desired effect.
The Creative Steps